DecisionRules is an intuitive, user-friendly and lightning-fast rule engine that focuses on the market needs and listens to its users. These are the reasons why we decided to implement a yet another way of creating rules and evaluating them.
What is a Decision Tree?
“A decision tree is a specific model implementing decision making processes. In decision analysis, a decision tree can be used to visually and explicitly represent decisions and decision making. As the name goes, it uses a tree-like model of decisions” — this is one of many definitions of the decision trees.
We at DecisioRules approached Decision Trees from a different perspective to enable all the users, both technical and business to create their tree structures without a previous experience with trees as such. The approach we chose is based on IF, THEN, ELSE statements in a combination with conditions. Decision Trees are currently in BETA version, meaning they work but extensions will some soon 😉
Create your first Decision Tree
The creation of a Decision Tree starts with the definition of the input and output model, just as in the case of Tables, Scripts or Flows.
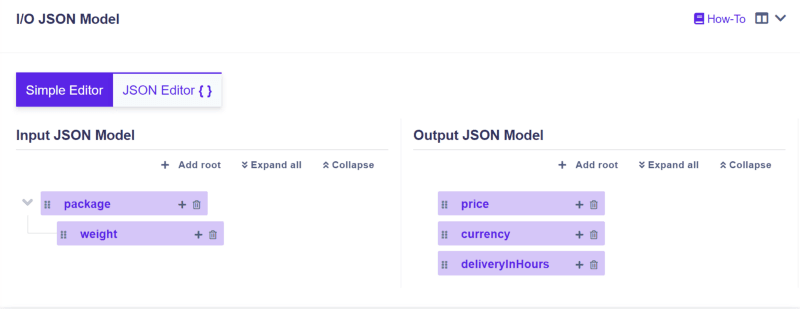
Once you are done with the meta-data, it is time to jump into the Decision Tree Designer (second tab on the upper part of the screen). Here the fun part comes!
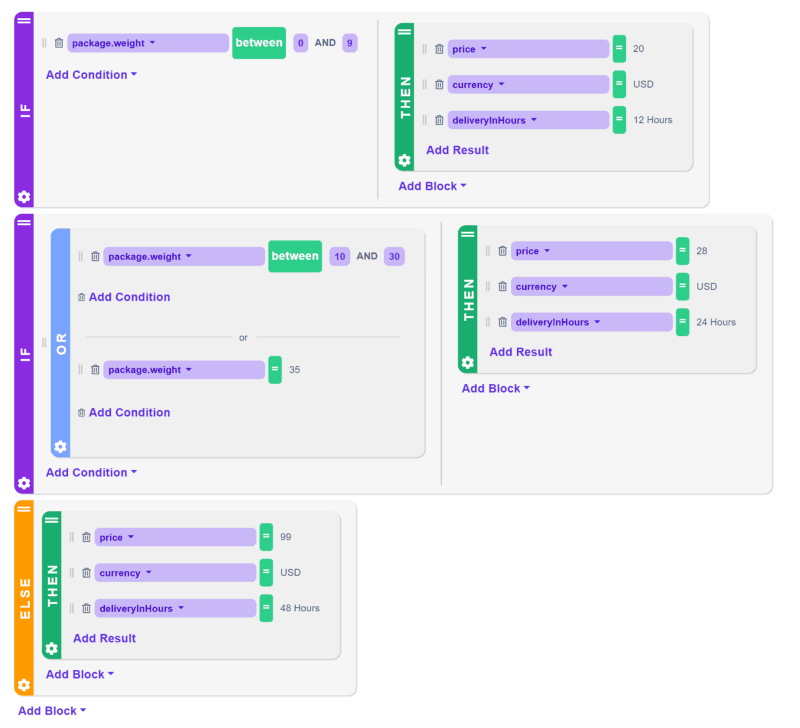
Every rule starts with the IF statement (block) where you define the condition you want to set. In our case the condition will be package.weight where we will set the value between 0 and 9. On the other side of the block, you can add multiple conditions to create branches, but we chose a THEN statement, which determines what will be the output (result) when the IF condition is matching the input. The results are price, currency and deliveryInHours.

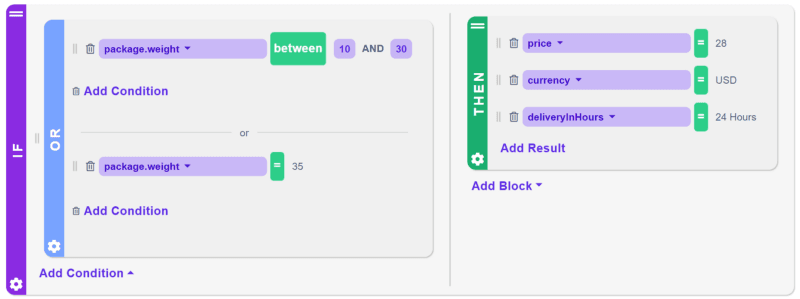
To make it a little more complex we are adding one more IF condition with the OR statement embedded. It means either one of the conditions in the OR statement is matching the input, the THEN (output) clause will be the result shown in the test bench or as an output of the API call.
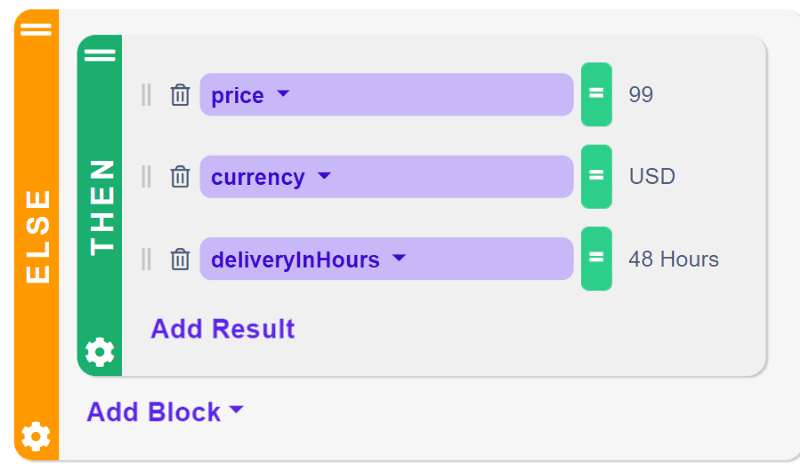
Not to forget another important block: the ELSE statement. What does it stand for? The ELSE statement specifies the “default” result if none of the other conditions are satisfied. Never forget the ELSE statement in your trees!
Now you are ready to execute the tree you have created. When running the Decision Tree it is evaluated in the way from the left to the right and from top to bottom. A more detailed guide can be found in our extensive documentation. Let us know your feedback on what you like and what you are missing.
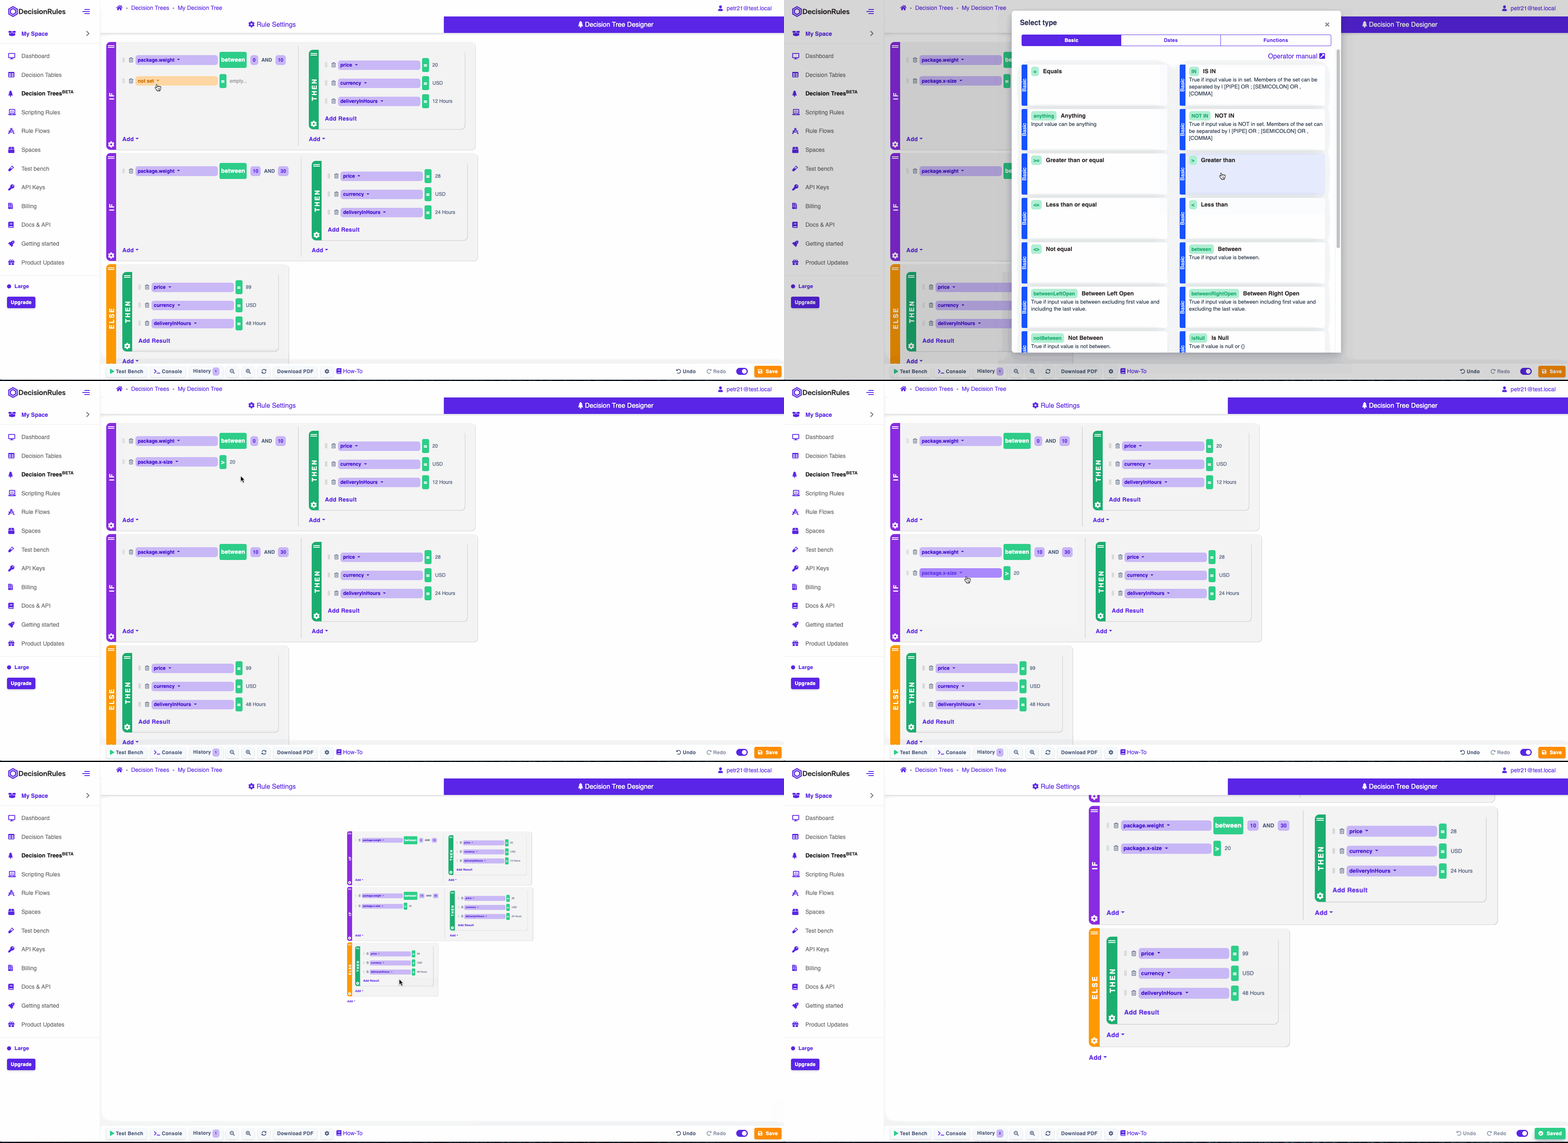
Get the most out of your branches!
Note on other releases
From the second half of the first quarter till the half of the second in 2022 we have worked on the Decision Trees which was a HUGE goal for the DecisionRules team. Even though we had a clear focus on the trees, we have managed to add a couple of other features as well:
- Application redesign — the users can easier access the rules from the same window, the colors of the application were changed to “mild” colors, the important sections were highlighted for more intuitive use.
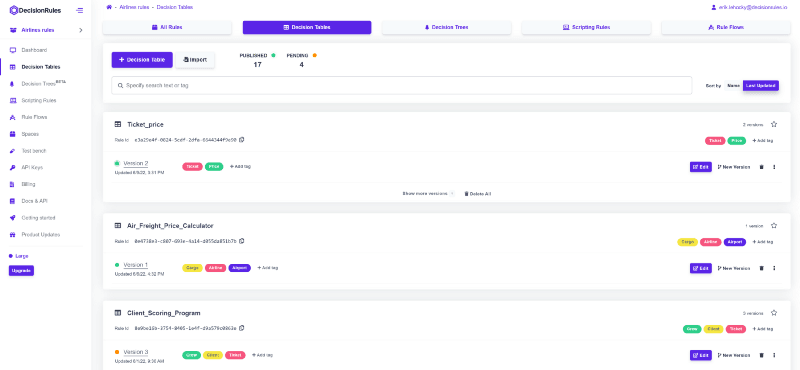
- Using a Microsoft account to log in — from now on, not only a Google account, custom SSO, but also a Microsoft account can be used to sign up or log in to the DecisionRules.
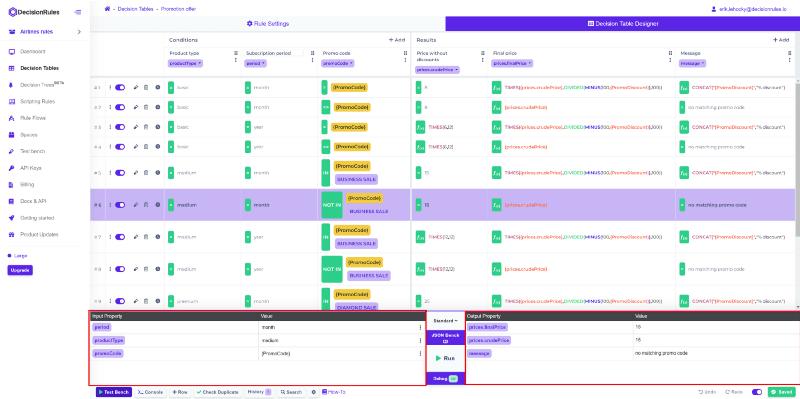
- Business-friendly testbench — the inputs can be inputted in a user-friendly table view without editing a JSON code, the same applies to the output.
- Rules sorting according to various attributes — sort your rule in the list of rules according to the name rule name or last updated.
DecisionRules offers a free of charge 30-days trial period, do not miss this opportunity!
***Thank you for reading 🚀

Erik Lehocky
Project Manager
